Using ds-dev to Develop Dropserver Applications
ds-dev is a command line tool that runs Dropserver applications locally for the purpose of developing apps.
Some features and capabilities:
- Serves apps at
localhostover plainHTTP(no need to set up TLS) so you can just fire it up and get going. - It can emulate any user of the appspace or a non-authenticated user, making it easy to test your app as a logged in user or as a member of the public.
- You can point it to an existing appspace data directory (like a backup you downloaded from
ds-host) to test your app changes on actual “production” data. ds-devwatches your application files and re-reads your app’s metadata after each save.- The UI shows your app’s metadata like routes and schemas.
- The UI has live views of logs, route hits, status, etc…
- Manually run migrations to test your migration code
- Set “Inspect” mode to debug your app code as it runs in the sandbox.
- Create an app package
Note:
There is a video demonstrating ds-dev in the tutorial.
Installing ds-dev
Get the ds-dev executable from the Dropserver releases page. The packaged executable is available for MacOS or Linux. Windows users should use the Linux version under WSL2.
Note:
Dropserver uses Deno as its sandbox, therefore ds-dev requires Deno to be installed and available on the path.
Running A Dropserver App in ds-dev
To run an app you are developing in ds-dev you point it to the directory of the app’s source:
$ ds-dev -app=/path/to/app/dir/Refer to the tutorial to learn what goes in the “app” directory.
Note:
Once ds-dev has started, you can leave it running while you work on your app code. It will reload the app when you save.
To provide an existing appspace as working data:
$ ds-dev -app=/path/to/app/dir/ -appspace=/path/to/appspace/files/If you downloaded appspace data from ds-host you must unzip it before pointing ds-dev to it.
Note:
The appspace data is never modified. ds-dev copies all the files from the provided directory into a temporary directory, and uses that as the working data.
Run a packaged app
You can also run a packaged app in ds-dev. This can be handy if you want to take a quick look at an app that has already been packaged, or if you’d like to test a new version of an app locally:
$ ds-dev -app=/path/to/mysuperapp-1.2.3.tar.gzds-dev UI Basics
Once running ds-dev should indicate that its UI is available at http://localhost:3003/dropserver-dev/. Make sure this port is available prior to running ds-dev.
Open http://localhost:3003/dropserver-dev/ in a browser window. The UI should show you basic data about your app, and appspace if there is any.
If the app was loaded without errors and no migration is needed for the appspace data, then you should be able to visit http://localhost:3003/ to access your app’s ”/” page.
App Tab
The “App” tab shows you data that ds-dev collected about your app. In particular the name, version, schema and migrations available, along with a table of app routes.
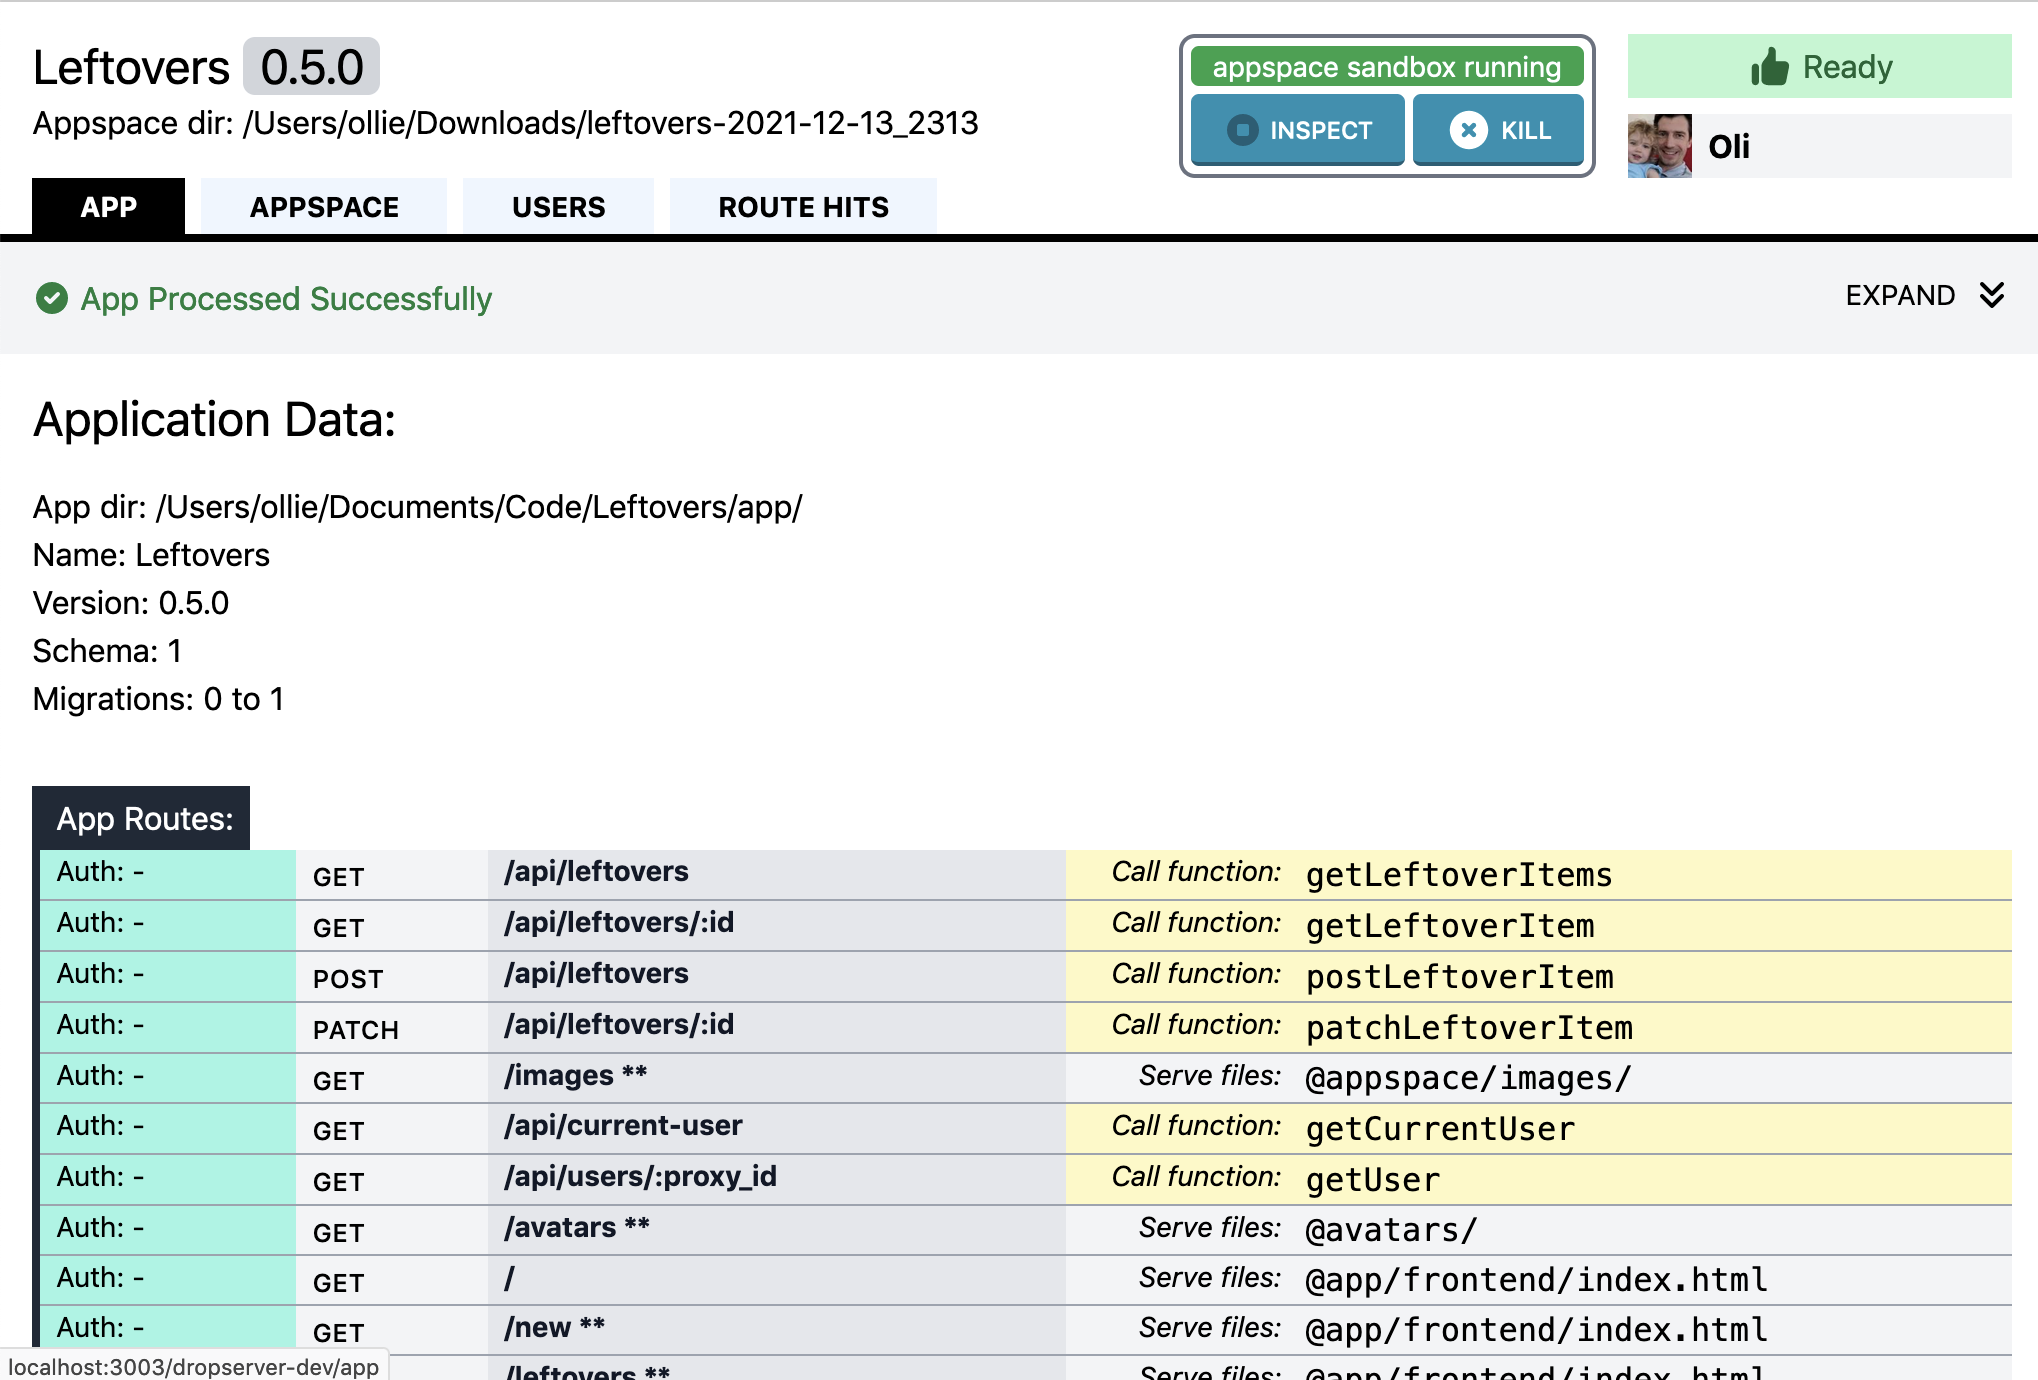
If ds-dev encountered an error while trying to read this data it will report it at the top of this panel. Clicking “Expand” reveals the app log, which will help you figure out where the problem is.
Appspace Tab
The “Appspace” tab is mostly concerned with the data of this appspace (remember that an “app” is just code and an “appspace” is essentially a data directory for an instance of the app. See application model page.)
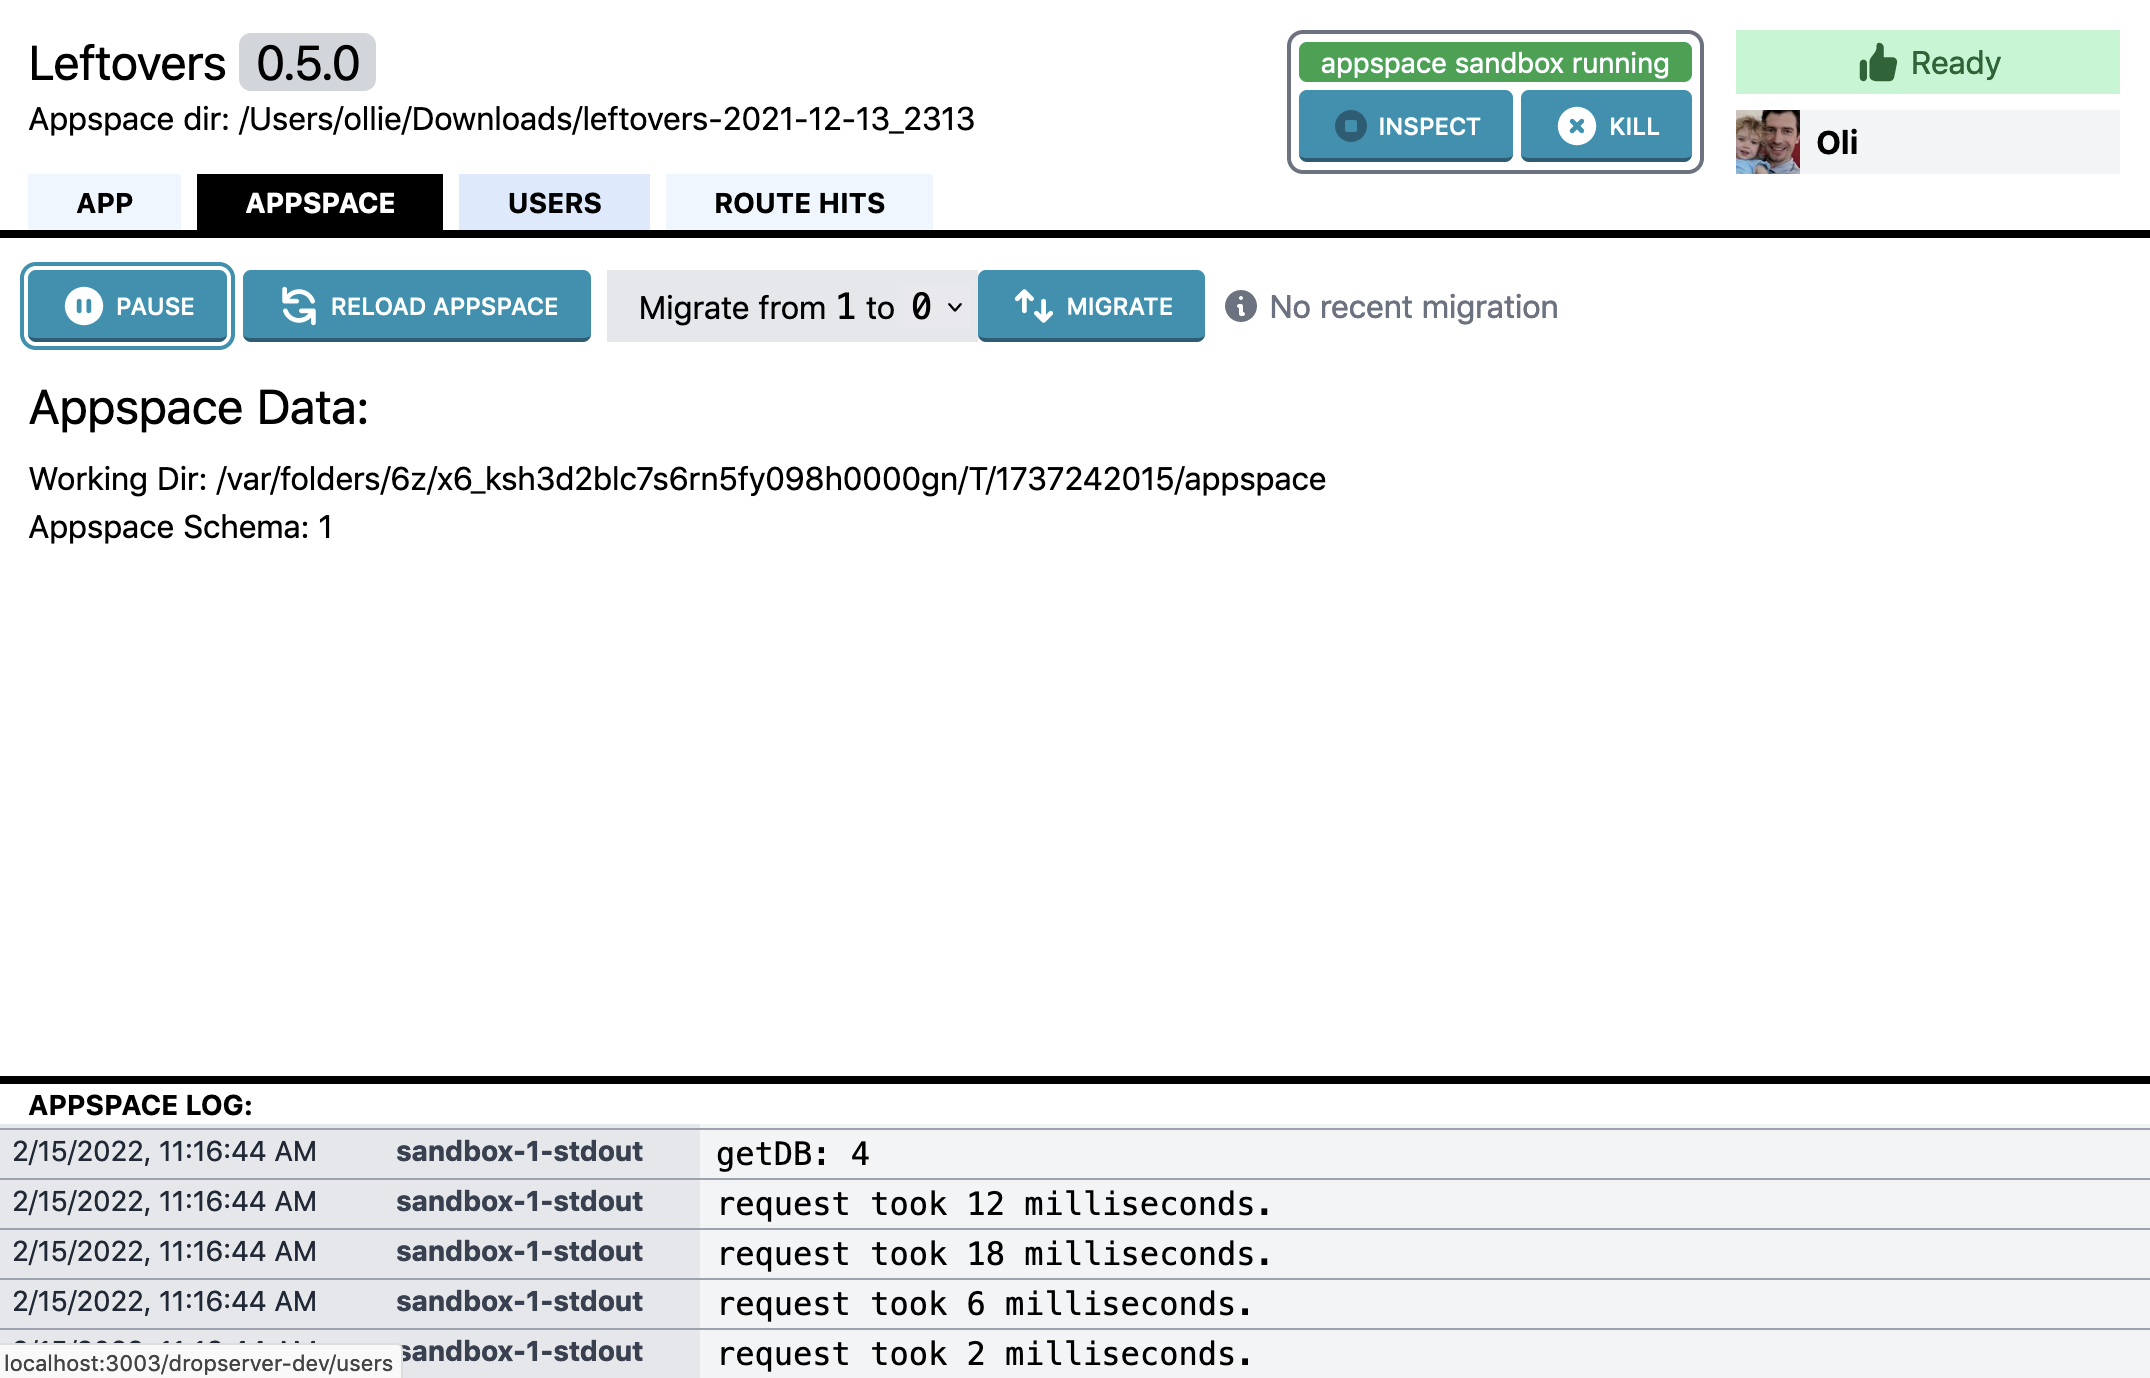
The buttons at the top of this panel include:
- Pause: “pausing an appspace” in Dropserver means blocking all access to it. All routes return “503: Service Unavailable”.
- Reload Appspace: in
ds-devthe app code operates on a copy of the provided appspace data. This button erases the working copy and re-copies the data then automatically runs migrations if any are needed. This is handy when some code you’re working on doesn’t quite work right and has corrupted your data. - Migrate: Manually run migration steps. Use this for testing migrations.
At the bottom of this tab, as well as the “Users” and “Route Hits” tabs lives the appspace log. All console log statements as well as some internal messages related to the appspace are reported there.
Users Tab
Displays users and lets you select a user to emulate.
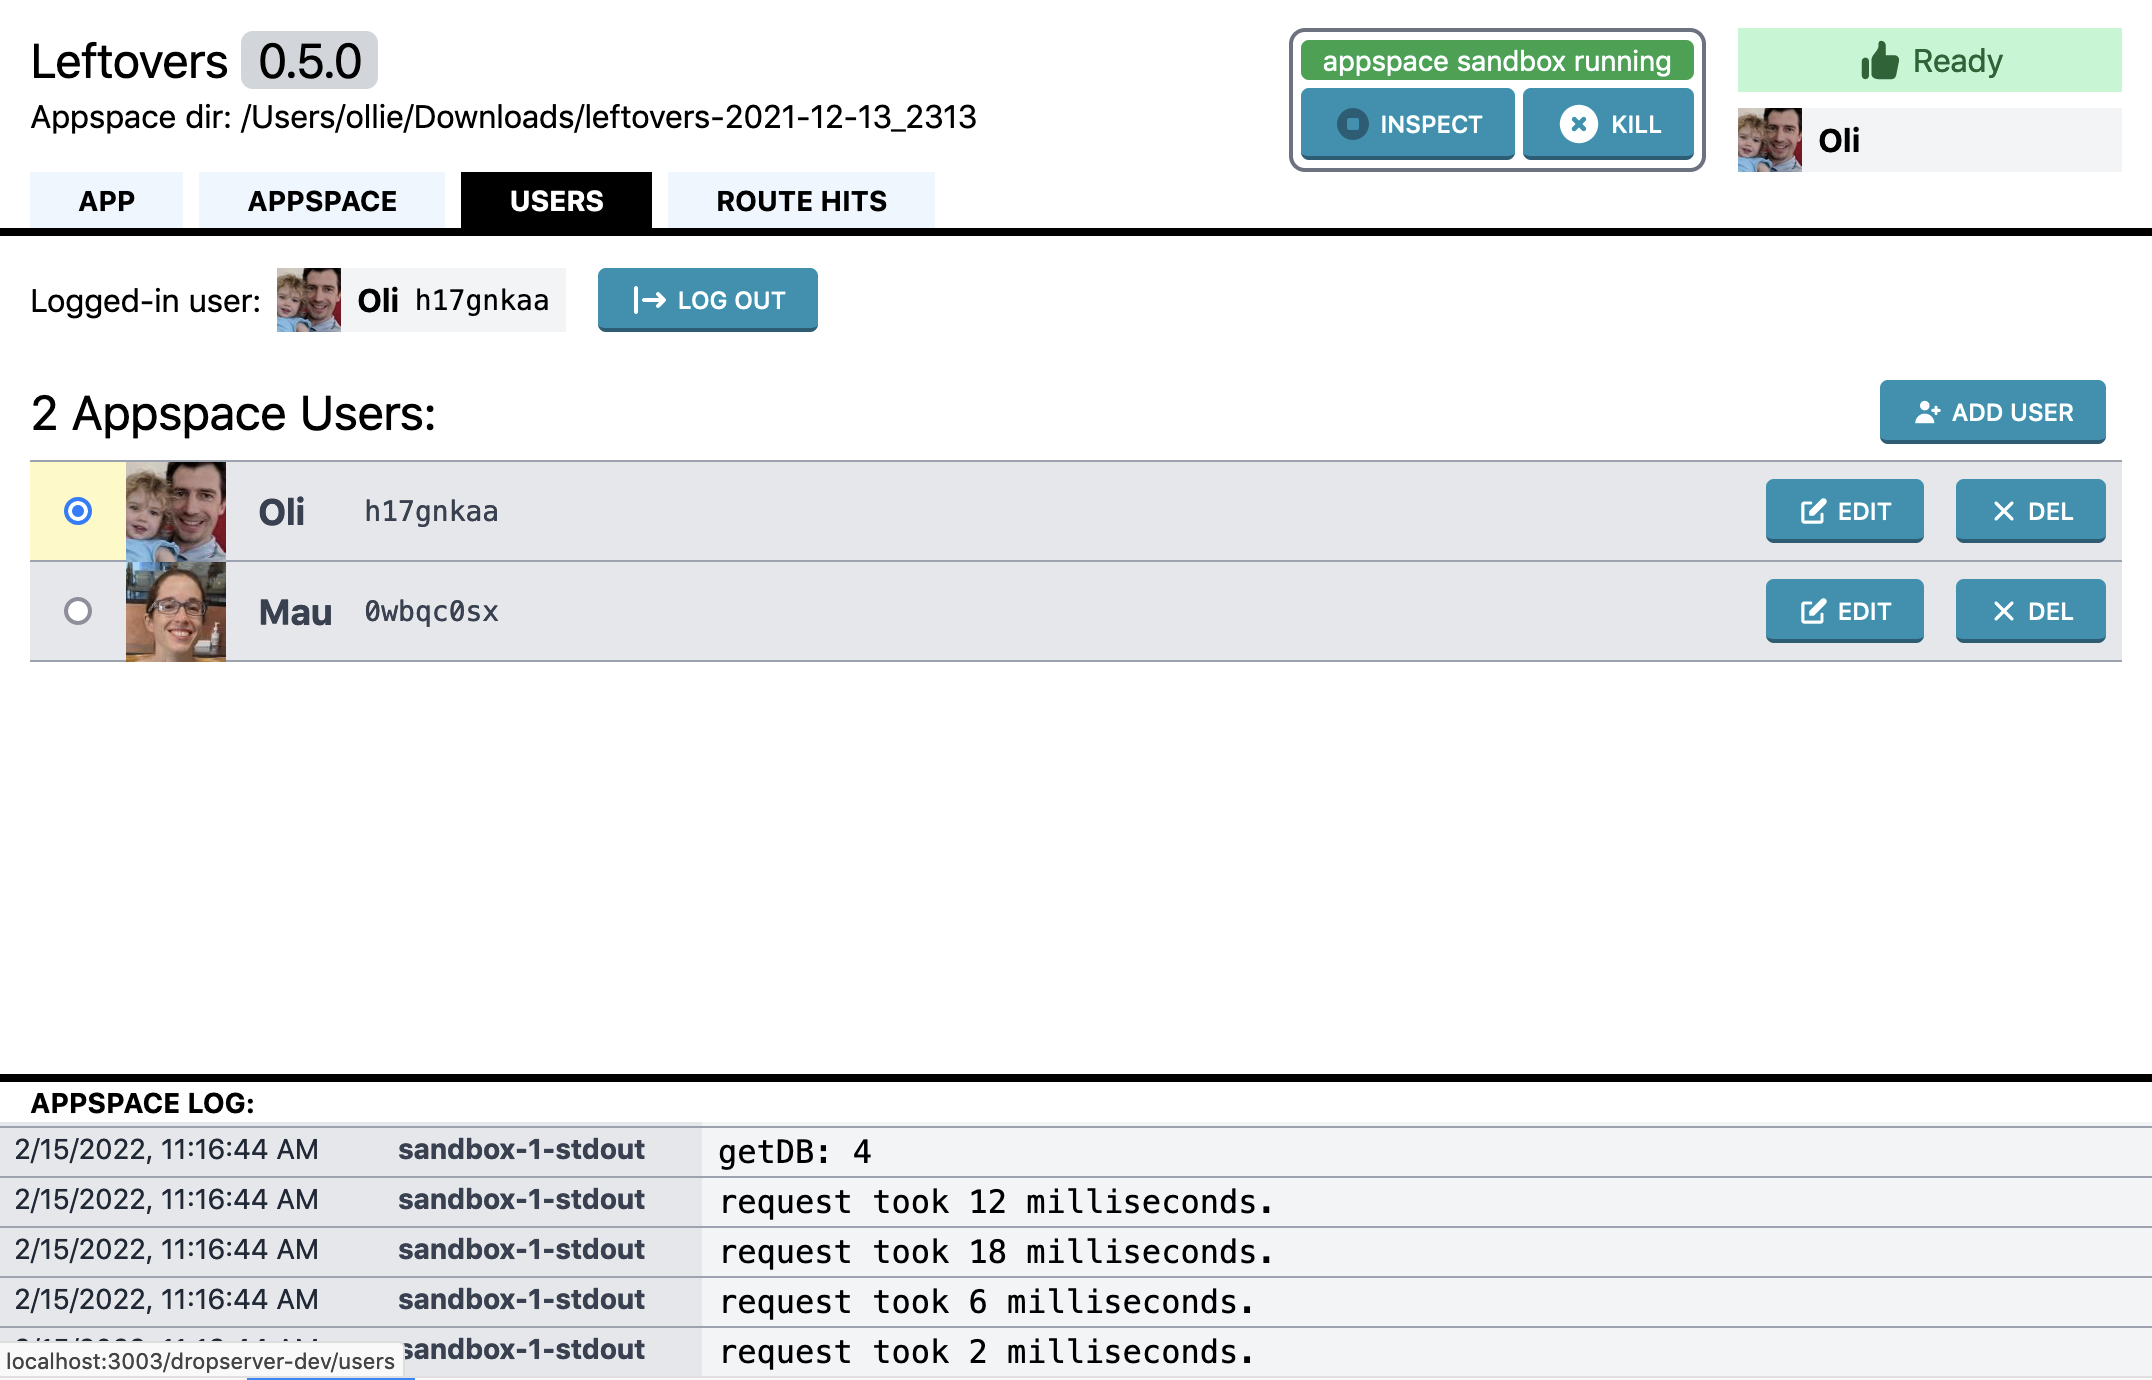
If you loaded an existing appspace, the users in that appspace will show up there.
Note:
Users are considered appspace data. Therefore when you “Reload Appspace” in the “Appspace” tab, you reset the list of users.
Click on the radio button to select a user to emulate. Click “Log Out” to emulate no user (your requests are unauthenticated).
Route Hits Tab
Requests made towards your appspace show up under “Route Hits”.
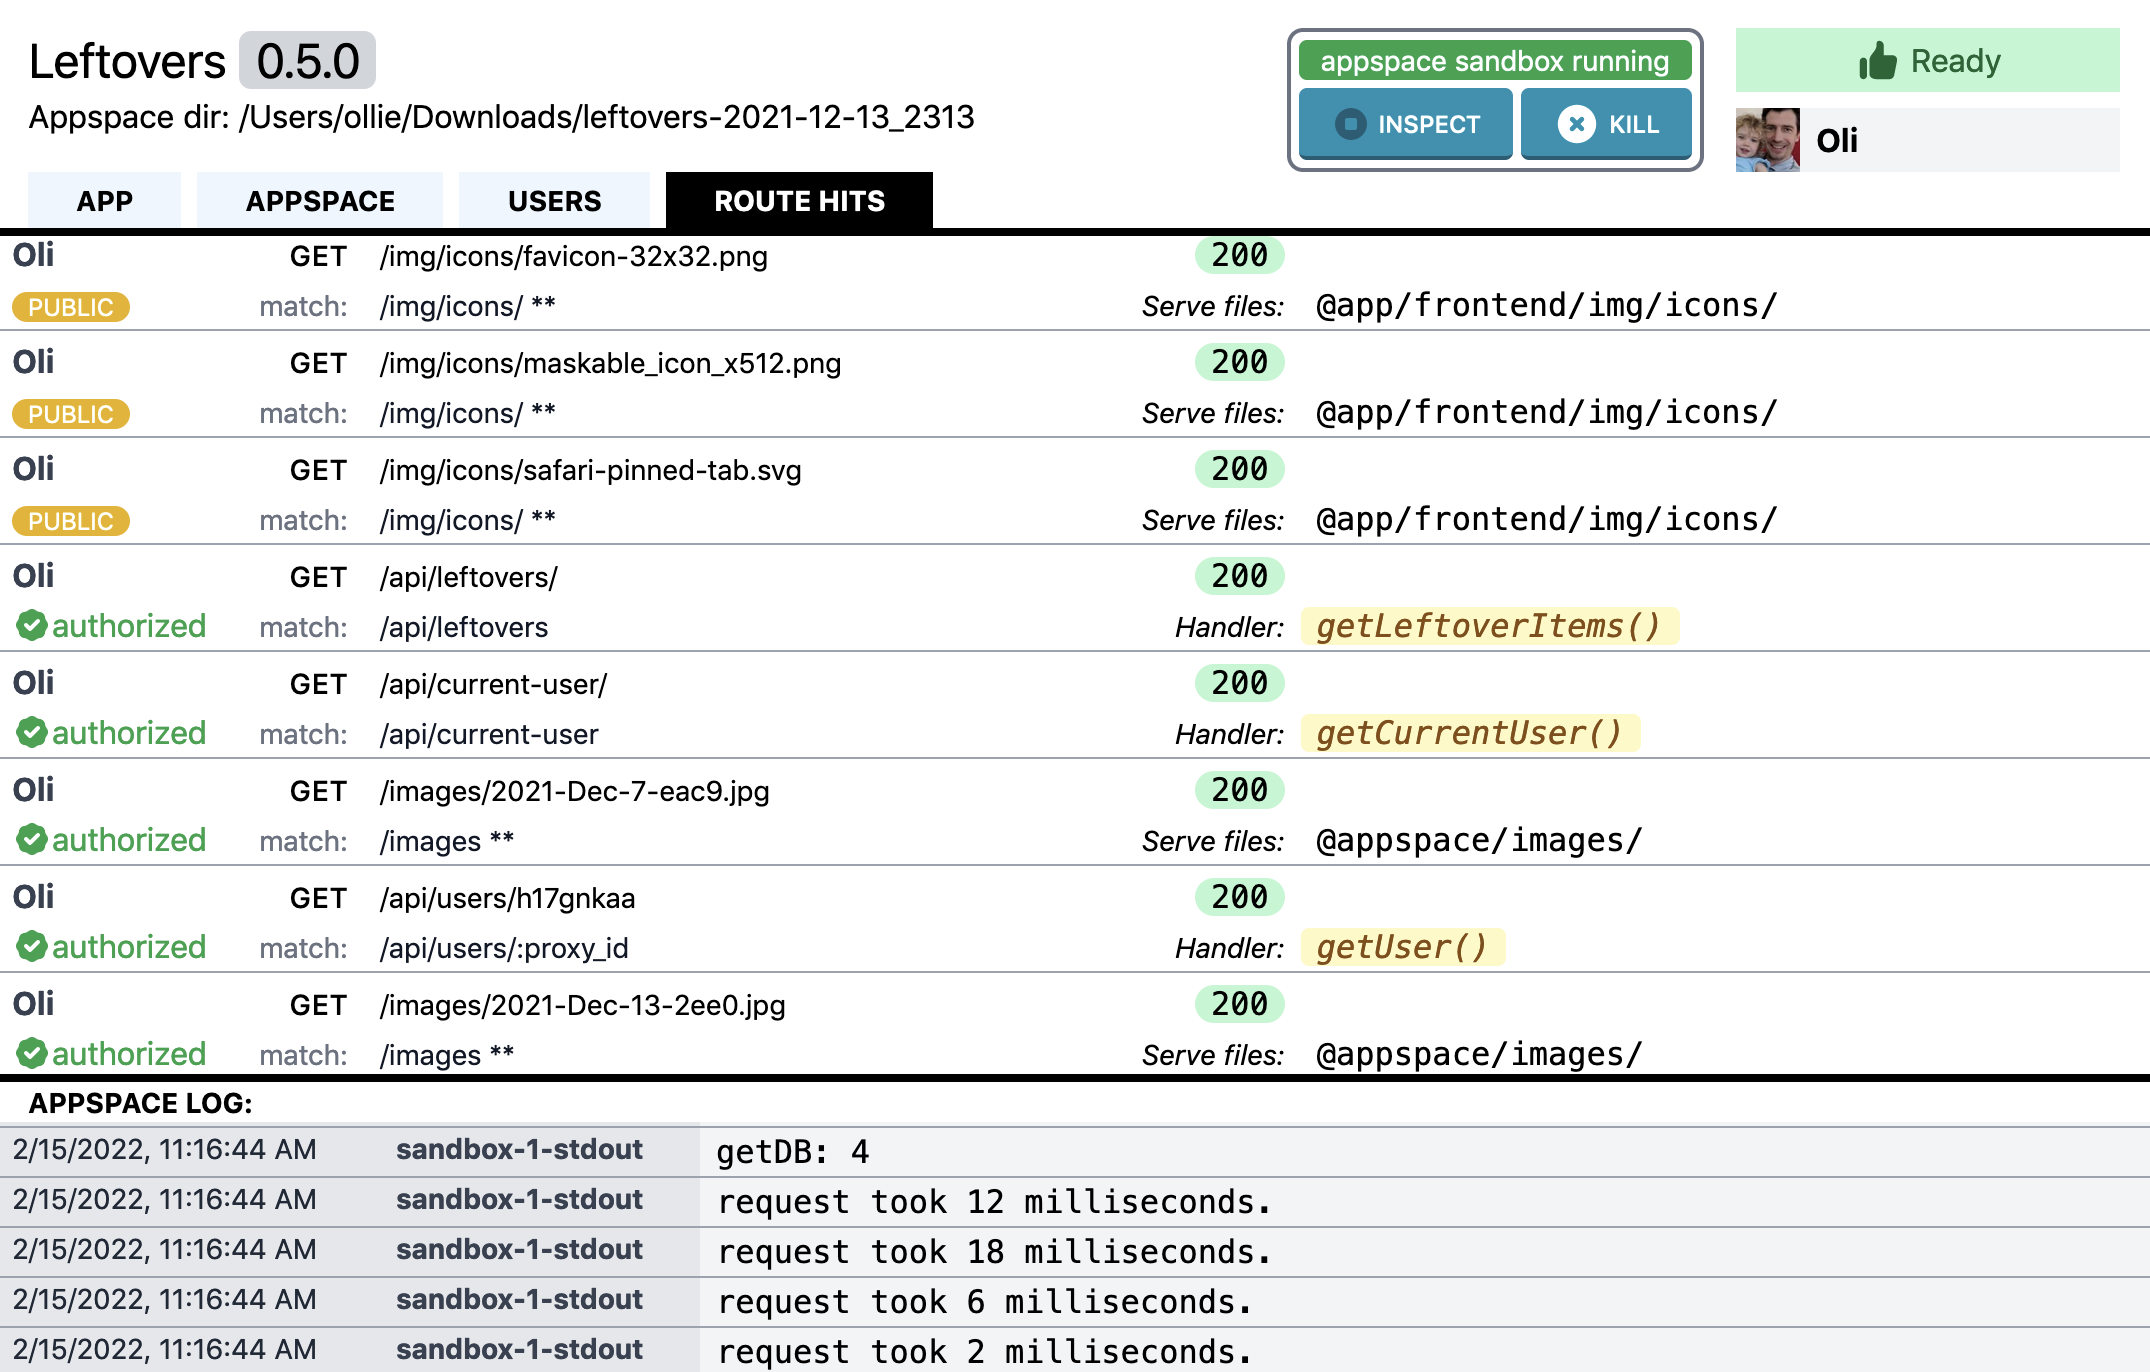
Each “hit” tells you what was requested (authentication if any, method, path) and the response code on the first line.
On the second line information about the matched route is shown: the authentication requirements, the route path, and the resulting action (serve static files or run function handler in sandbox).
Sandbox Control Widget
In addition to the four tabs we just outlined, an important feature is the sandbox control widget at the top of the ds-dev interface.
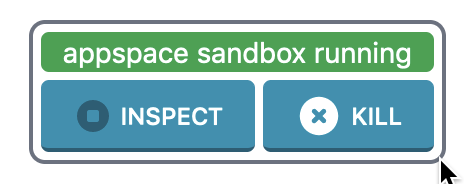
You will see the status of the sandbox change as the system reloads app metadata, runs migrations, and executes route handlers.
Click the “Inspect” button to inspect running code. The process is as follows:
- Click “Inspect” button to tell
ds-devyou wish for it to run the Deno sandbox with--inspect-brk - If a sandbox is already running, it will stop.
- Do something to trigger the sandbox to start:
- To inspect app processing (if you got an error in the “App” tab for example) save a file in your app directory to trigger the reload.
- To inspect migration code, manually trigger a migration in the “Appspace” tab.
- To inspect a route handler, load that route in your browser.
- The sandbox will enter “starting sandbox” status, and wait.
- Open the Chrome browser at `chrome://inspect” and click on the Deno instance (or use another compatible debugger).
- Open files, set breakpoints, and resume execution to let the sandbox finish starting.
- When you are done click “Inspect” again.
Create an App Package
To create a package that can be installed on ds-host from the app files run the following command:
$ ds-dev -app=/path/to/app/dir/ -create-package=/path/to/output/dir -package-name=my-super-app-package-name is optional but highly recommended. Generated file names will start with “my-super-app” and will include the version specified in the manifest: my-super-app-1.2.3.tar.gz and my-super-app-1.2.3.json, etc…
-create-package generates the following files:
- the actual
.tar.gzpackage file which can be installed onds-host. - a
.jsonmanifest file that includes metadata extracted by running the app before packaging. - an icon file, copied from the application icon specified in the manifest. The saved filename consists of a hash of the contents of the file.
- a
.txtfile that contains the changelog for the current version only.
The package file can be installed manually on a Dropserver instance. The last three files are used when creating the distribution site.
Create an App Distribution Site
To create app distribution website files, run this command:
$ ds-dev -create-listing=/path/to/packages/dir/Where /path/to/packages/dir/ is the directory where you generated the package files.
Optional arguments are:
-base-urlsets the base URL in the app listing. This is normally not necessary.-html-templateis the path to a mustache template to use instead of the default. The original template is in the Dropserver repository at/cmd/ds-dev/distsite/index.html.
This command will generate app-listing.json alongside the package files. It contains a list of versions and the filenames for the package, manifest, changelog, and app icon. It also generates an HTML file that presents your application to a potential visitor, along with installation instructions.
After uploading all the files in /path/to/packages/dir/ to a static site server, any Dropserver user can install your app and keep it updated. See App Packaging and Distribution.
What Next?
- Build a hello world app in this tutorial.
- Report any problems with
ds-devin github issues. - Question or comment? Find me, the developer, on Mastodon, Bluesky, or on my site.